
Electronic Miter box! Control a Stepper Motor with a Keypad and an Arduino
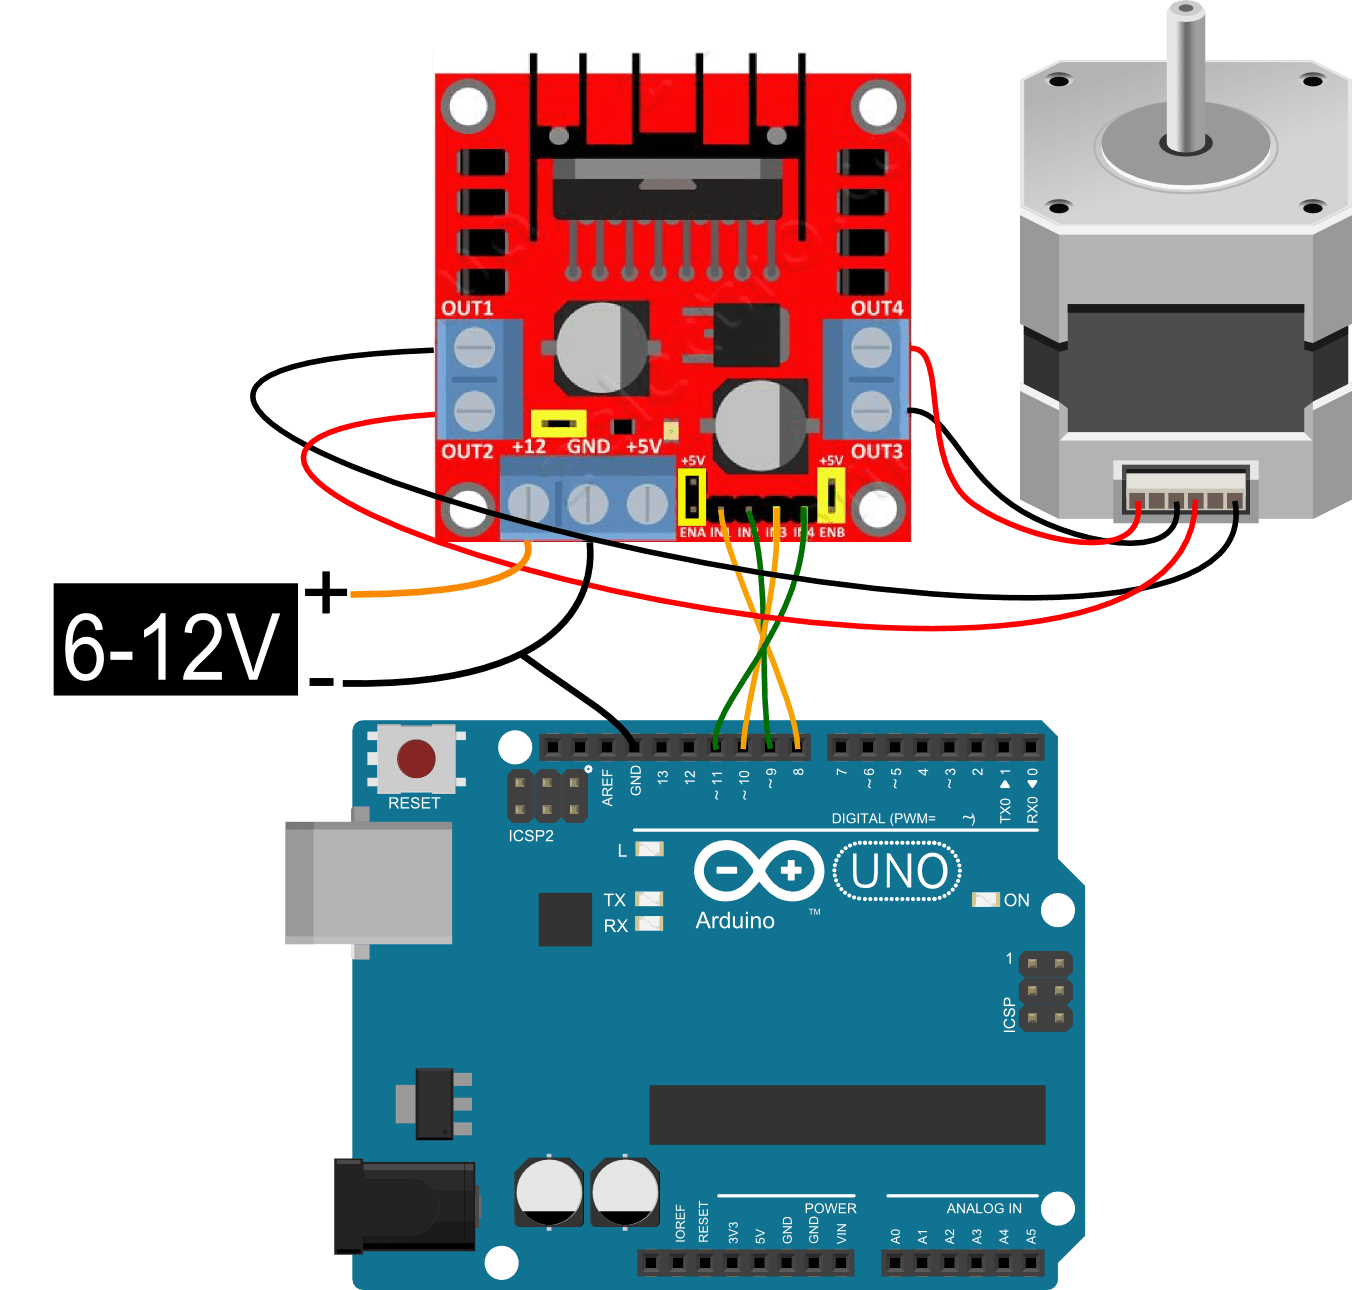
Step 1: How to Connect Them We connect the stepper motor to the shield using the following steps: Carefully mount the Arduino Motor Shield on top of the Arduino. Be careful not to bend any pins.

TB6600 Stepper Motor Driver with Arduino Tutorial (3 Examples)
Arduino Nano; Stepper Motor - NEMA 17; Stepper Motor - NEMA 23; DRV8825 Stepper Driver; Power Jack; 12V 2A Adapter; Micro Limit Switch; For more details on this project, click here. DIY Arduino based Winding Machine. DIY Arduino based Winding Machine. Description: This handy machine is a dream tool for electrical and electronics engineers.

Controlar un motor paso a paso (stepper) 28BYJ48 con Arduino Carlini's Blog
As you might expect, there is an Arduino library to support stepper motors. This makes the process of using a motor very easy. After including the 'Stepper' library, the four control pins 'in1' to 'in4' are defined. To tell the Arduino Stepper library which pins are connected to the motor controller, the following command is used: Download File
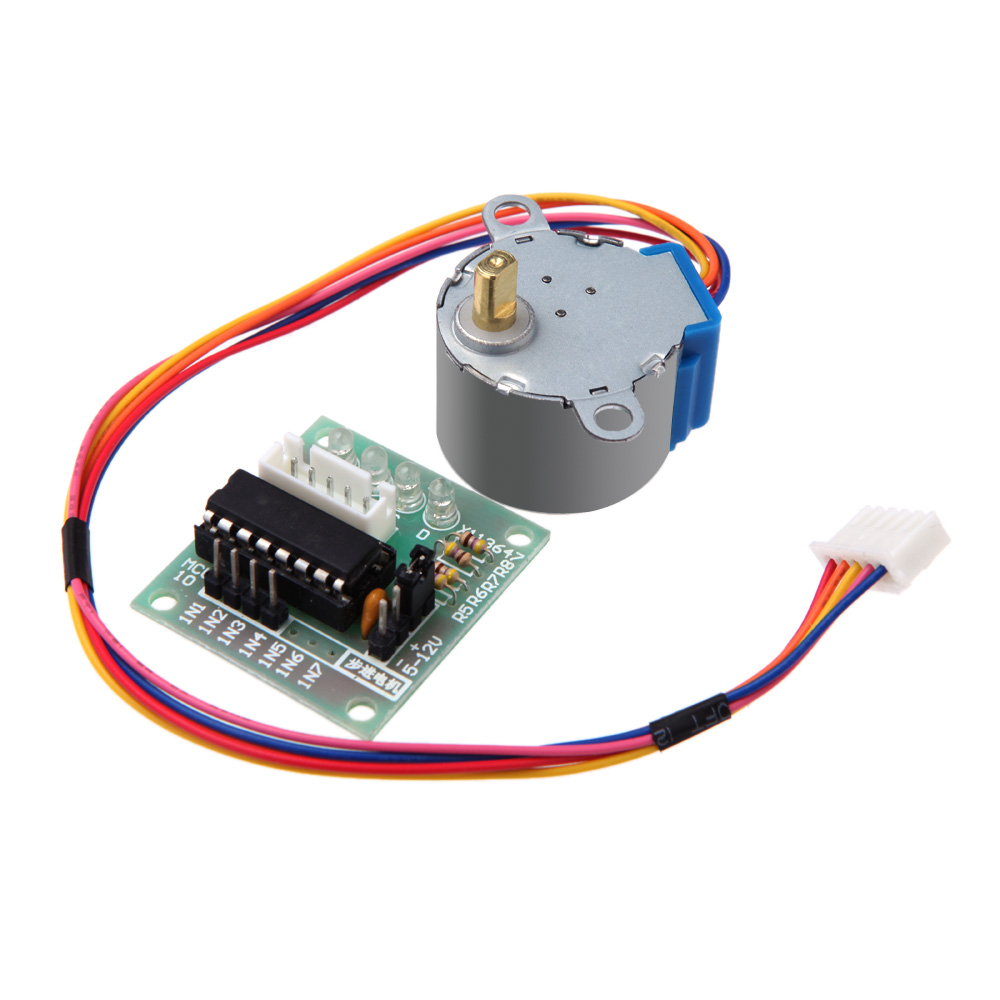
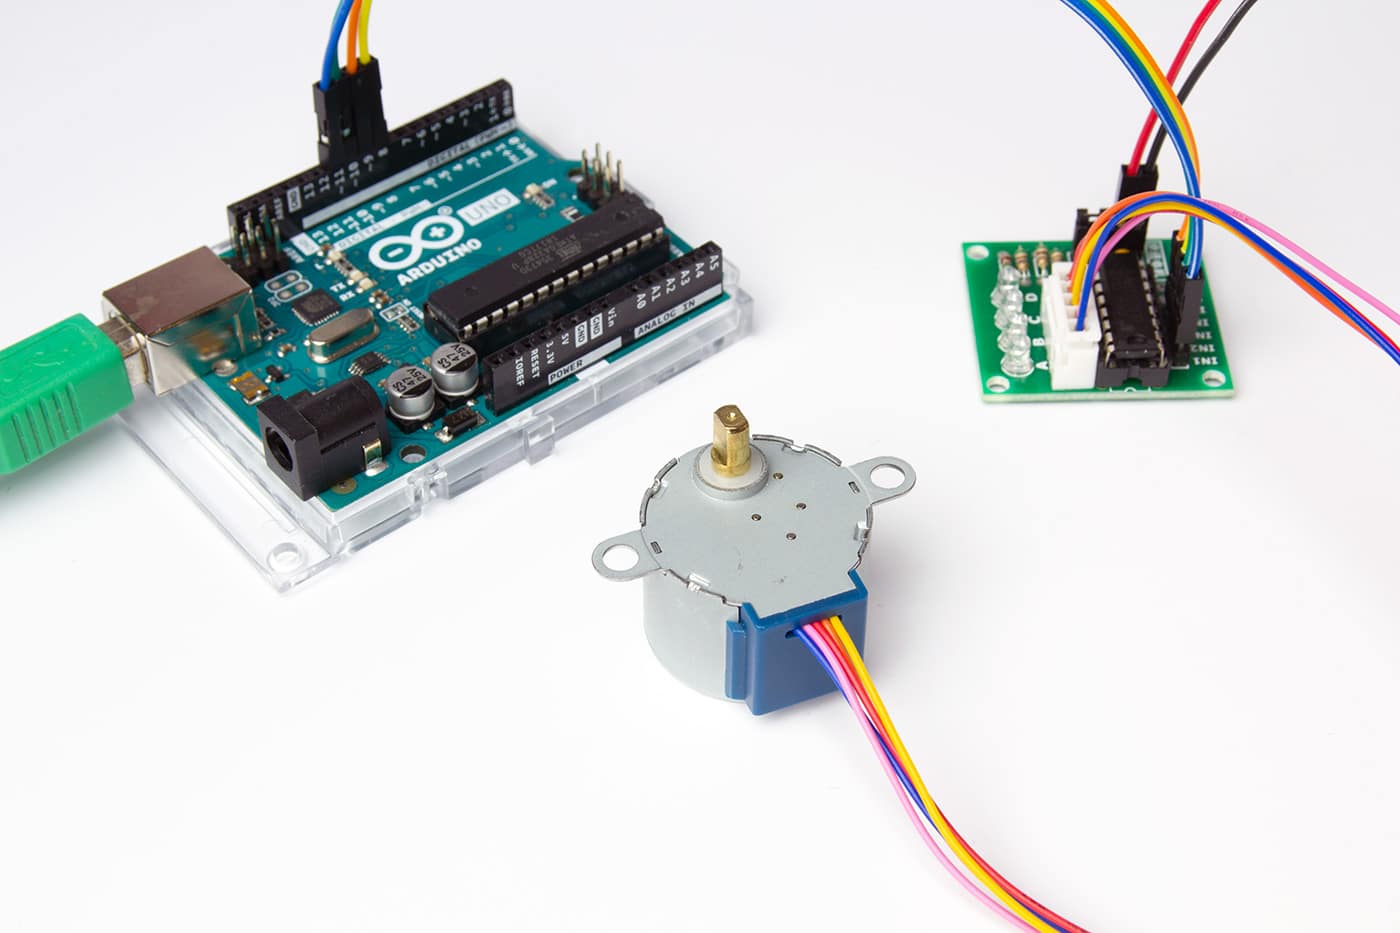
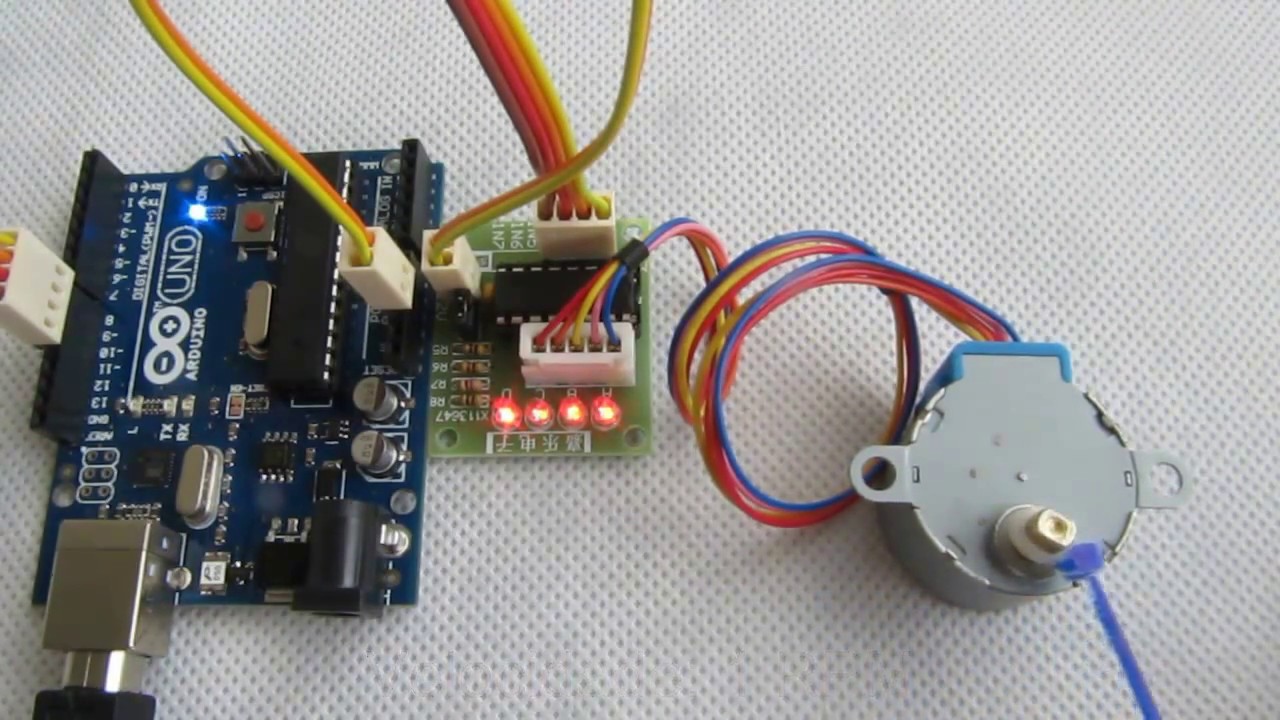
5V 4Phase Stepper Step Motor + Driver Board ULN2003 for Arduino with drive Test Module
Arduino step motors work similarly to servos, but with some key differences that make it easier to gain precise control over the motor's movements. In a step motor, four coils form a ring around a rotor. Each coil is activated in succession, magnetically drawing the rotor towards it, rotating it 90 degrees.

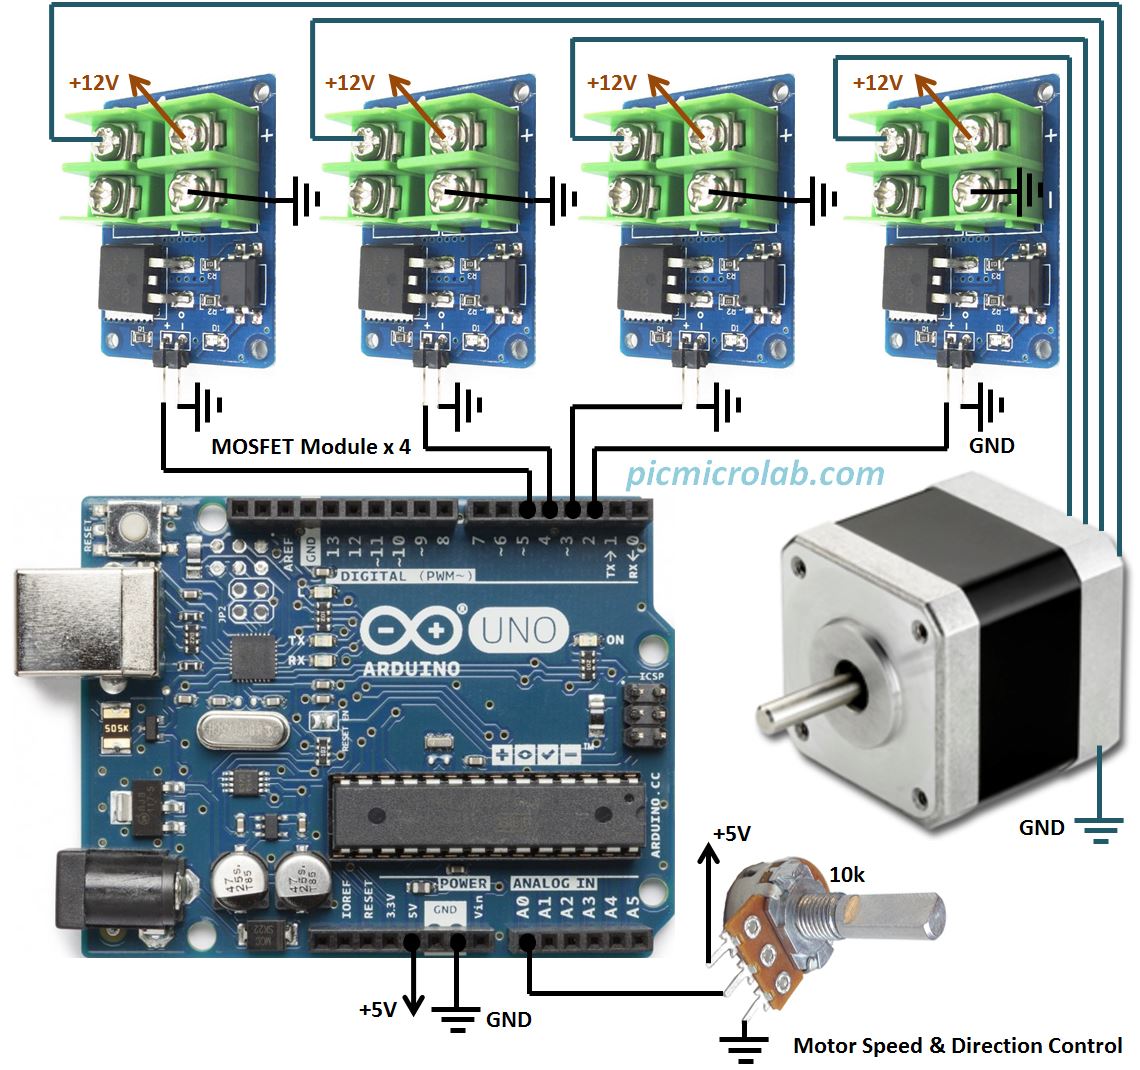
Control a Stepper motor using an Arduino and Potentiometer
About Stepper Motor There are two types of step motors: bipolar stepper motor and unipolar stepper motor. They differ from each other in the internal structure and the working principle. With the naked eyes, they look similar to each other. However, we can distinguish them by the number of wires. The bipolar motor usually has four wires.
L298N MOTOR STEPPER(ADUINO) GugusLangitBlog
The step sequence of the 28BYJ-48 unipolar stepper motor is IN1-IN3-IN2-IN4. We will use this information to control the motor by creating an instance of the stepper library myStepper with the pin sequence 8, 10, 9, 11. Make sure you do it right; otherwise, the motor won't work properly. Stepper myStepper = Stepper(stepsPerRevolution, 8, 10.

Arduino uno stepper motor basic Arduino Project Hub
Arduino - Stepper Motor A Stepper Motor or a step motor is a brushless, synchronous motor, which divides a full rotation into a number of steps. Unlike a brushless DC motor, which rotates continuously when a fixed DC voltage is applied to it, a step motor rotates in discrete step angles.

Control Stepper Motor with Arduino Tutorial YouTube
jremington January 14, 2024, 1:52am 2. ibbob: add any additional current for the steppers. A suitable stepper driver is used to control the stepper current, and you should be using a separate power supply for any motors, steppers, servos, etc. Please post the details of your setup, especially the steppers, and a wiring diagram.
Stepper Motor Controller with Arduino
1. Continuous rotation example code How the code works: 2. Sketch to control number of steps or revolutions Code explanation: 3. Acceleration and deceleration example code How the code works: Conclusion Other stepper motor tutorials: Control a stepper motor with L298N motor driver and Arduino

Arduino Project 20Arduino Joystick and stepper motor tutorial
Stepper Device Control Allows Arduino boards to control a variety of stepper motors. This library allows you to control unipolar or bipolar stepper motors. To use it you will need a stepper motor, and the appropriate hardware to control it. Go to repository Compatibility
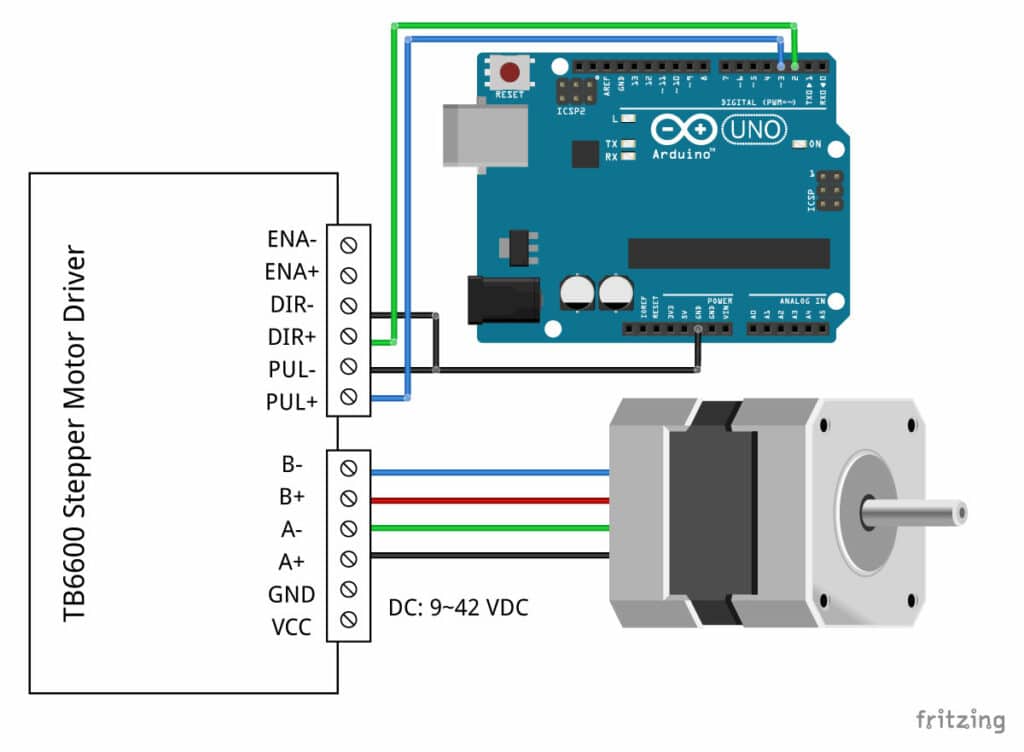
TB6600 Stepper Motor Driver con Arduino Tutorial (3 Ejemplos)
Manufacturer and Supplier for Stepper Motor, Brushless DC Motor, DC Motor, AC Motors, Planetary Gearbox, Linear Actuator, Drivers and Controllers
28BYJ48 Stepper Motor with ULN2003 + Arduino (4 Examples)
Step 1: What Is a Stepper Motor? A stepper motor consists of two main parts, a rotor and a stator. The rotor is the part of the motor that actually spins and provides work. The stator is the stationary part of the motor that houses the rotor. In a stepper motor, the rotor is a permanent magnet.
Arduino Stepper Motor Control, Using Pololu Driver The DIY Life
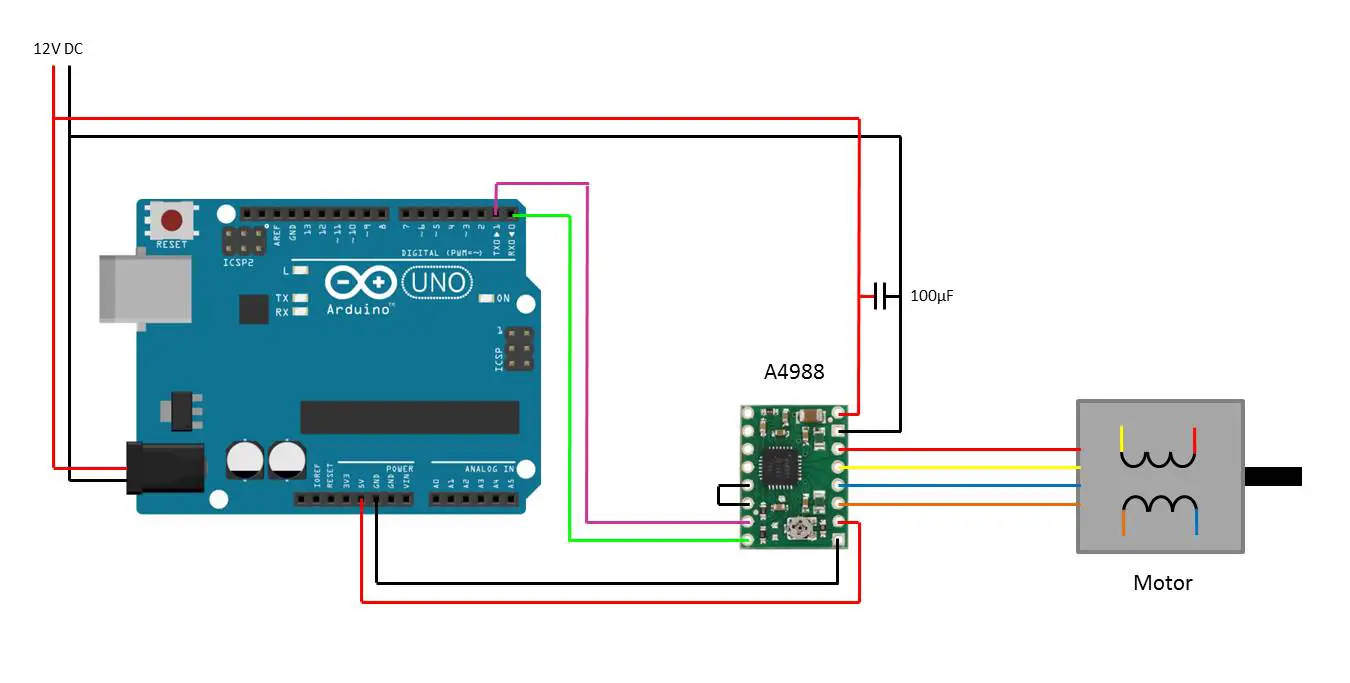
In this tutorial we will learn everything we need to know about controlling stepper motors with Arduino. We will cover how to control a NEMA17 stepper motor in combination with a A4988, a DRV8825 and a TMC2208 stepper driver.
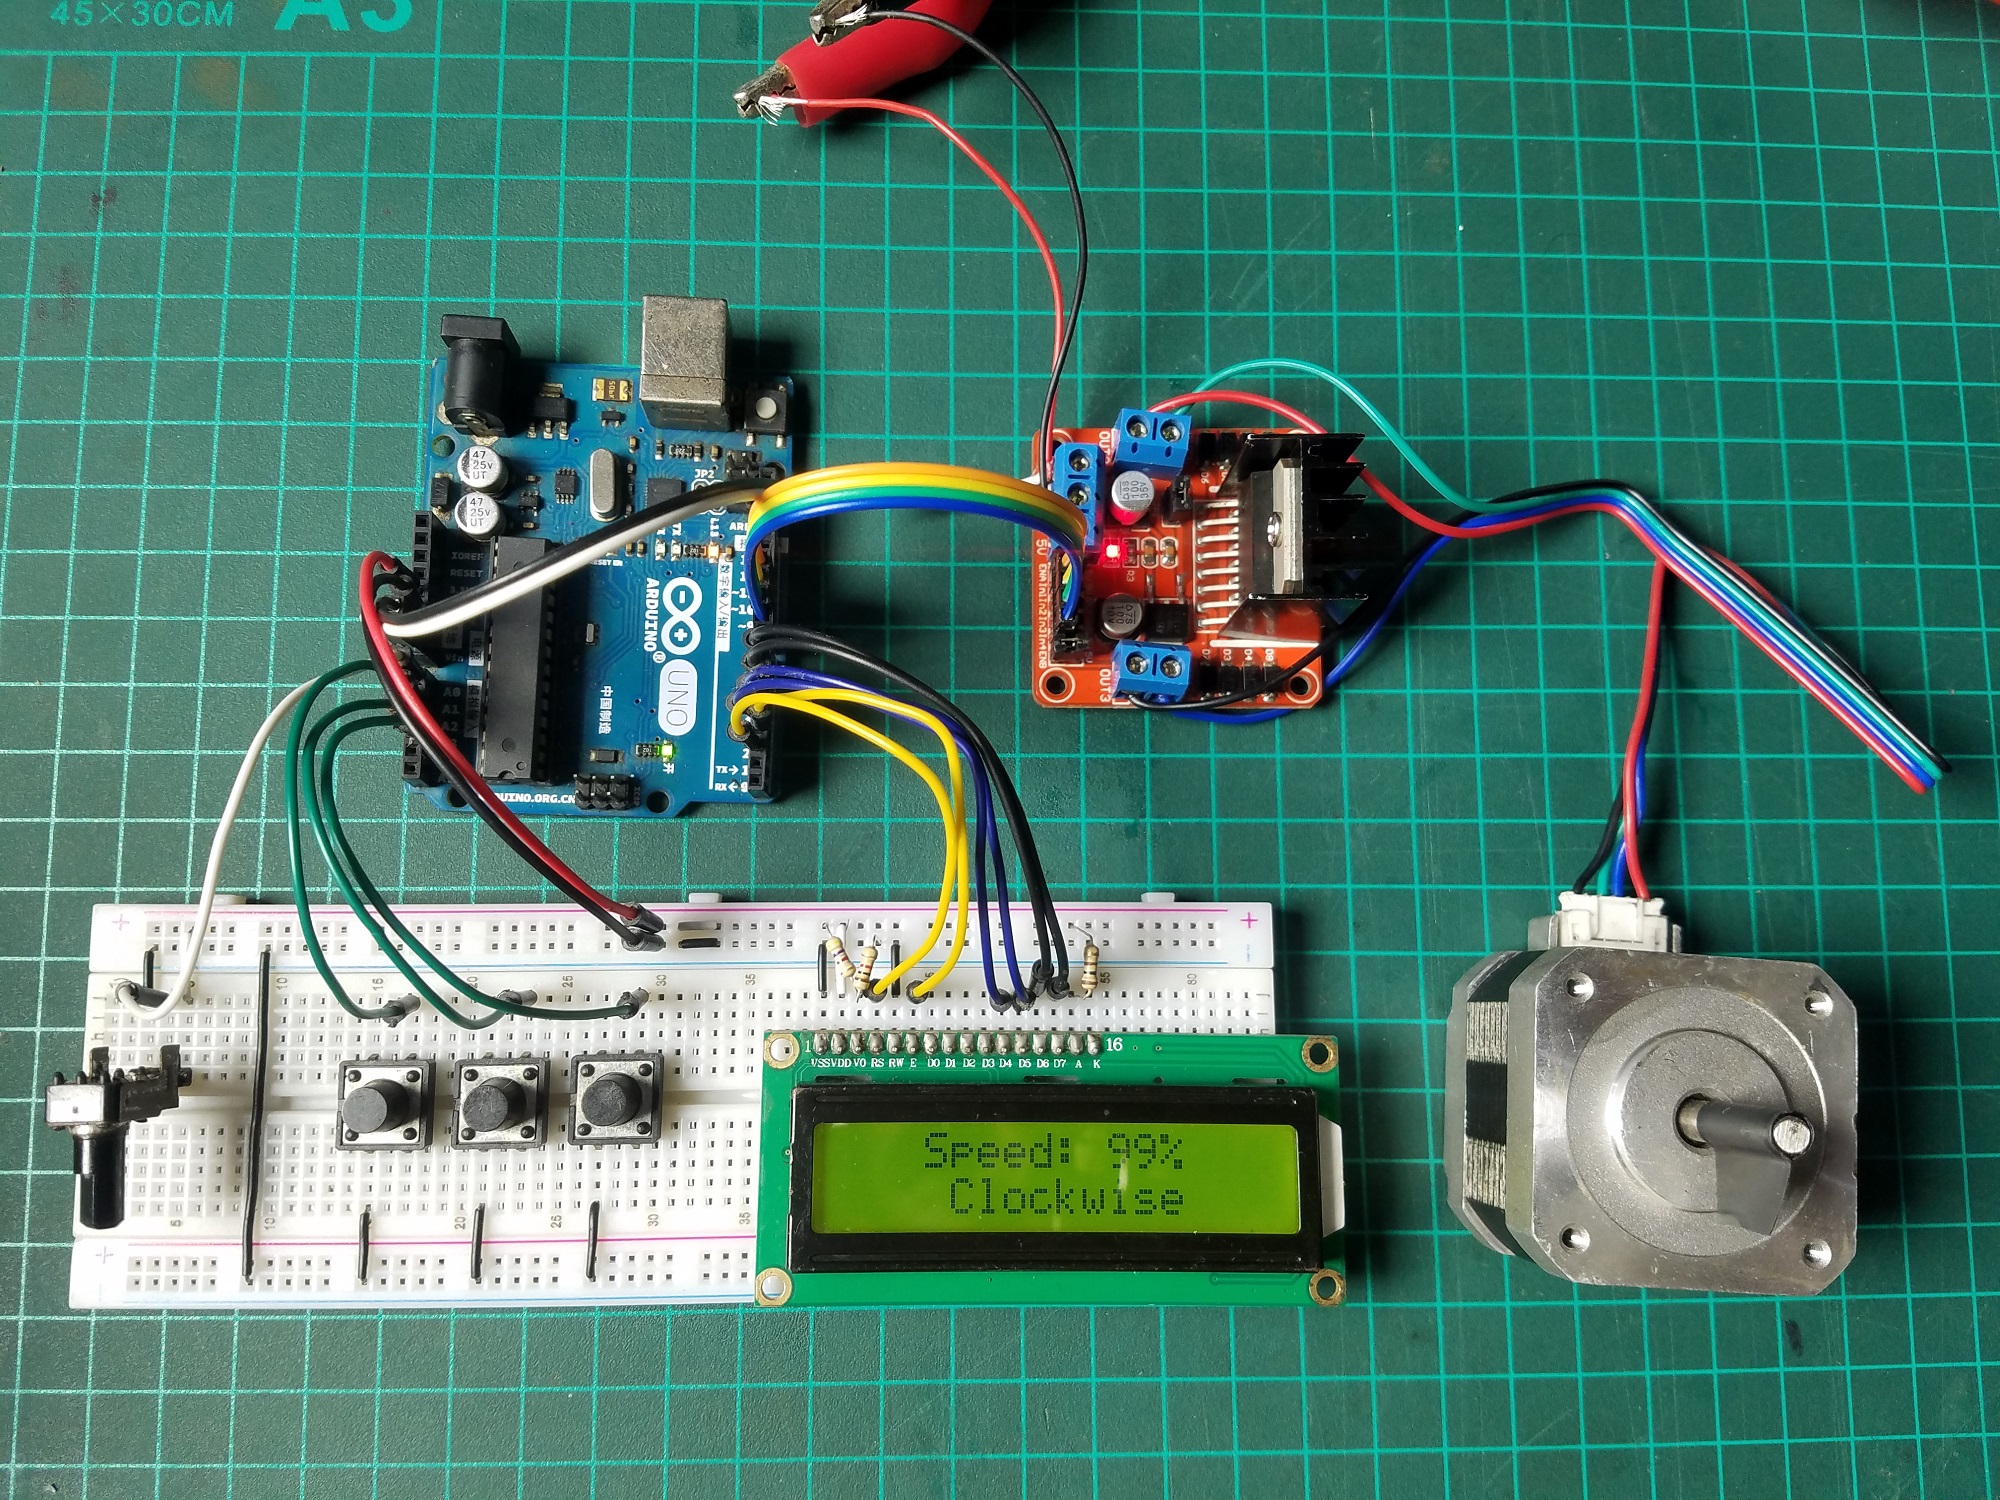
Stepper Motor Speed Controller Arduino Project Hub
Stepper Motors are brushless DC motors with the shaft attached to a series of permanent magnets that control the shaft rotation to 32 equal steps. The shaft is connected to a series of gears to reduce its speed and increases the torque of the motor. In a 28BJY-48, these gears reduce the speed by a factor of 64.

Overview Arduino Lesson 16. Stepper Motors Adafruit Learning System
The first section of this sketch is the same as in example 1, but the setup and the loop are different. The motor will run five revolutions back and forth with a speed of 200 steps per second and an acceleration of 50 steps/second 2. /* Example sketch to control a stepper motor with L298N motor driver, Arduino UNO and AccelStepper.h library.
28BYJ48 Arduino Stepper Motor de Passo Step YouTube
This driver can be used with the same code as the A4988 and has a current rating of 3.5 A. TB6600 Stepper Motor Driver with Arduino Tutorial. The DRV8825 driver chip has several safety functions built-in like overcurrent, short circuit, under-voltage lockout, and over-temperature protection.